Note: This guide adapts lots of info and verbatim passages from this archived guide.
If you’ve recently bought — or are looking for — a DDR cabinet, you are likely interested in adding more songs to it. One of the most popular approaches is to connect it up to a PC so you can run StepMania, an open-source music game simulator, which allows you to run custom songs, themes, mods, and game modes.
These steps can all be reversed, so you can still use the hardware that came with your cabinet.
Items that you might need to purchase or otherwise physically procure are highlighted in green.
Note: if you are not interested in connecting to your cab’s monitor, speakers, and your cab and pad’s lights — or if you only own official DDR pads and no cabinet — you might be more interested in reading about boards which turn your pads into USB devices that you can plug directly into PCs. The rest of this guide assumes you want to use your cabinet.
Disclaimer
Although this guide is written with safety foremost in mind, please be aware of the inherent risk of working on high-power electronics and wiring.
Before beginning a cabinet conversion, please understand that this is being done at your own risk. There is no warranty for a conversion, and it can, if done improperly, potentially ruin the machine.
Please have an understanding of the functions of the machine, electro-static discharge safety, and use caution when handling machine parts, even when shut down.
What cabinet do I have?
It’s important to determine what sorts of components you have in your DDR cabinet. The type of components your cabinet has will determine the sort of PC and other hardware you’ll need to buy. I would suggest starting by following my guide on DDR cabinets and PCBs.
Put simply: most cabinets in the western market are Generation 1. They usually come with one of the following PCBs: a System 573 (DDR 1st to Extreme), Python 2 (DDR SuperNOVA series), or Bemani PC (DDR X and beyond). They also likely have a CRT display, although you’ll find that many have been converted to use LED displays instead.
This guide will attempt to walk you through the conversion process, and I will point out what steps correspond to which types of cabinet components.
Getting a PC
If you don’t have a Bemani PC, you’ll need a PC of your own.
For 573 or Python 2 owners
Because 573s and Python 2s are glorified PlayStation consoles, you can’t install StepMania on them. The good news is that StepMania has very low hardware requirements — any PC from the last decade should run it just fine.
If you want to run fancy themes or play songs with a lot of effects, you should probably get at least 8GB of RAM. A SSD will also significantly improve load times, and a dedicated graphics card or AMD APU might improve frame rates.
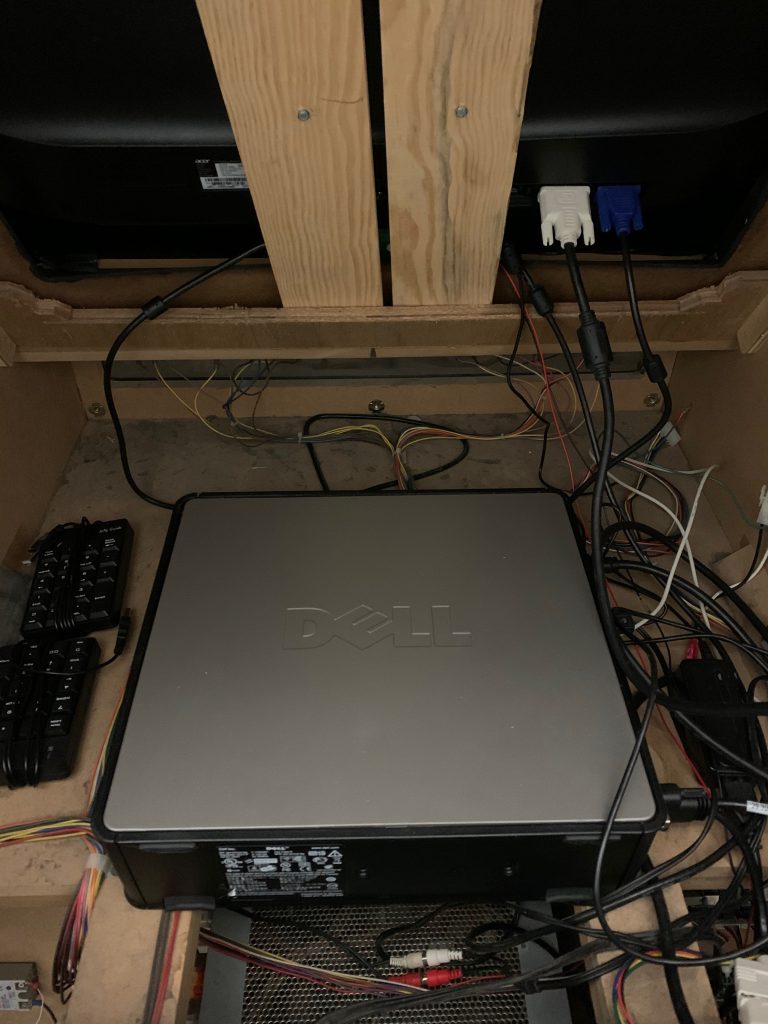
Separate from running StepMania, if you want your PC’s specs to be similar to those found in official Bemani PC hardware, you might look for Dell Optiplex 700-series PCs, which are often very easy to find on eBay. I personally bought an Optiplex 780 for just $50. The small-form-factor (SFF) build is small enough to fit inside the monitor portion of my cabinet (since the CRT has been replaced with a LED). I also went for a Radeon R7 250 GPU (If you get a SFF PC, you’ll need a low-profile video card), which is the best card that Optiplex 700 supports, for about $25. If you have a CRT, though, you’ll need a GPU that has VGA output – or use a DVI-to-VGA adapter.
For the sake of working easily with other hardware you’ll connect to the PC, I’d recommend installing Windows 7 or above, although Windows XP or a Linux distro will work if you’re okay with putting in more work. There is a helpful guide on setting up Windows 10 Enterprise/LTSB to hide most UI as the machine boots, although many of these settings will work for older versions as well.
There is also a separate guide on having a dedicated StepMania setup using a custom Arch Linux image. It is already configured to work with CRT monitors and a variety of I/O and lights devices.
Once you’ve set up your PC, read this guide on setting up StepMania!
For Bemani PC owners
Bemani PCs are actual PCs, all running different versions of Windows. You’ll still need a proper build of StepMania to work with the interface in the back of the PC — more info on that below.
Connecting the cab to the PC
For your safety, ensure your cabinet is off, unplugged, and discharged before opening it up!
Power
The easiest option is to power your PC externally, but that means turning it on separately and most likely having it sit adjacent to the machine instead of inside it. If you want to be able to throw a single switch, this approach isn’t for you.
Other approaches vary based on the type of cabinet. Almost all of them demand a certain level of electrical engineering knowledge, so if you are uncomfortable with voltages and amps and the like, consider asking for help.
A straightforward approach could be to cut the power cable coming from your PC’s power supply and wire it into the control transformer in your cabinet (if it has a terminal block). Ensure your PC’s power supply is set to the proper voltage depending on which screws you connect to. Understanding wire crimping, continuity, grounding, etc. are beyond this guide’s scope, so ask for help if necessary.
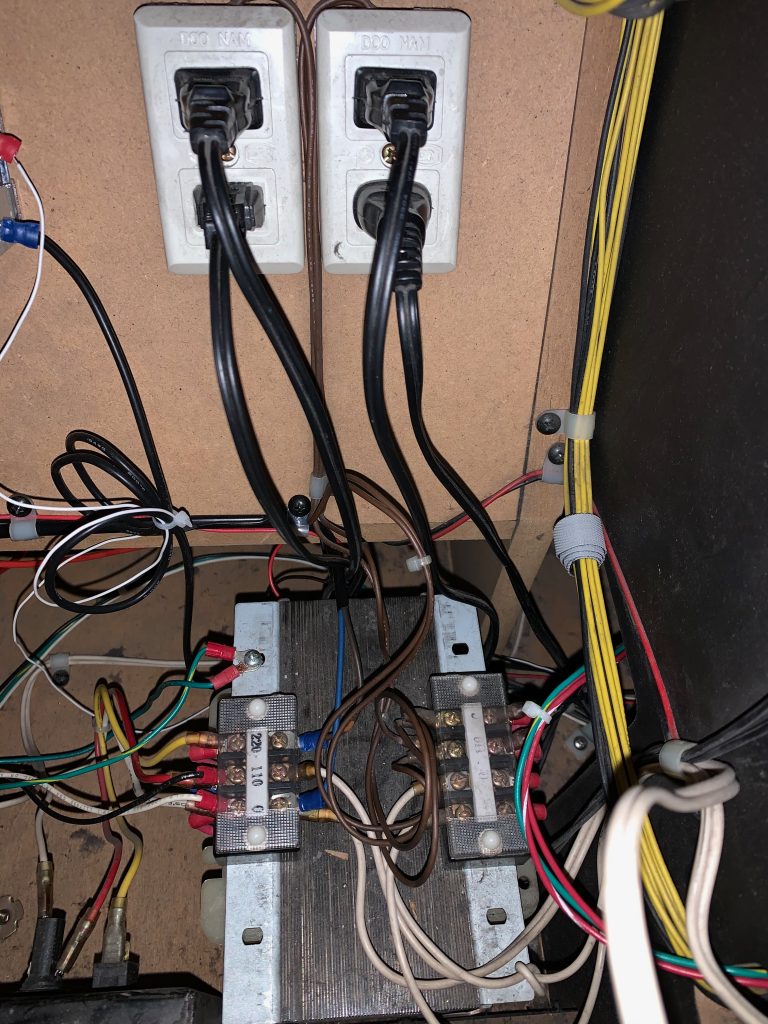
If you have a K-cab, it’s possible that your cabinet has some 110v two-prong outlets inside it. If one of them is not in use, you can plug your PC into it using a cheater plug, although it’s obviously good practice to connect its ground tab to something.
Some power supplies (in Betsons, for example) might have passthrough IEC connectors, but they often do not pass adequate amperage, so plugging into one might not be a great approach.
If connected to the cabinet, your PC will lose power when you use the panel inside the coin door to switch the machine off. You can configure your PC to automatically turn on after power loss.
Speakers
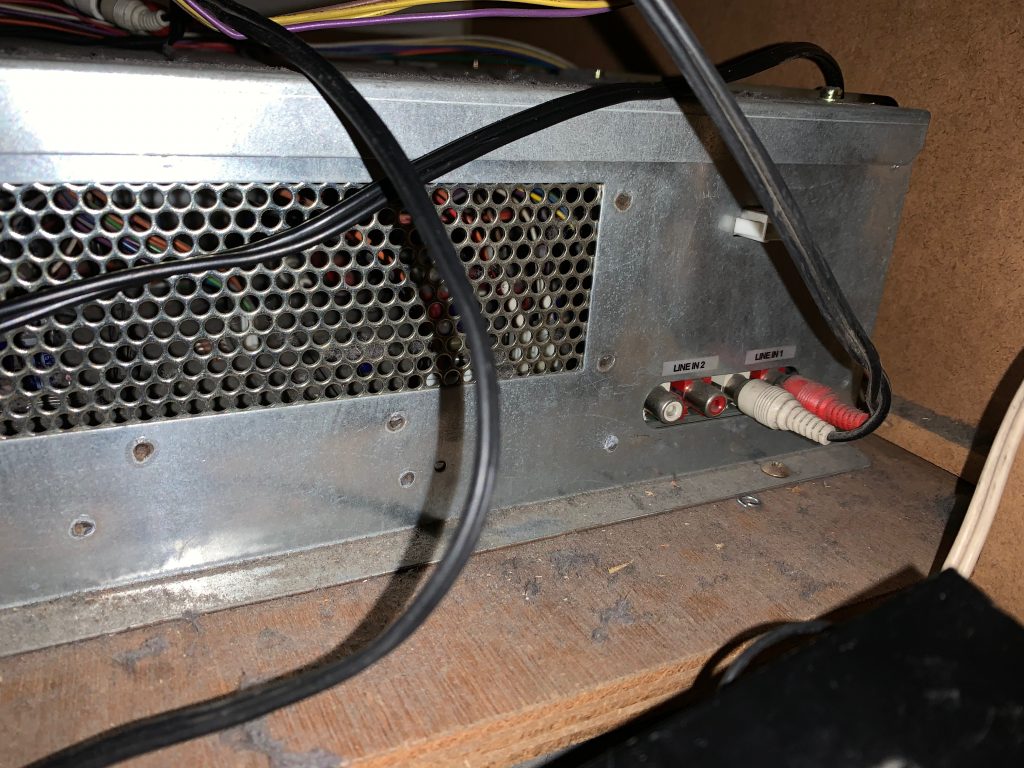
Your cabinet has an amp box that connects to the speakers. It has RCA audio jacks for input, so you’ll need an RCA to 3.5mm stereo cable. Plug the 3.5mm end into the speaker port in the back of your PC.
Inputs & Lights
System 573
If you have a 573, you’ll need to buy one or more devices to transmit your cab’s input and light signals via USB to your PC. As of 2021, the only non-discontinued items are:
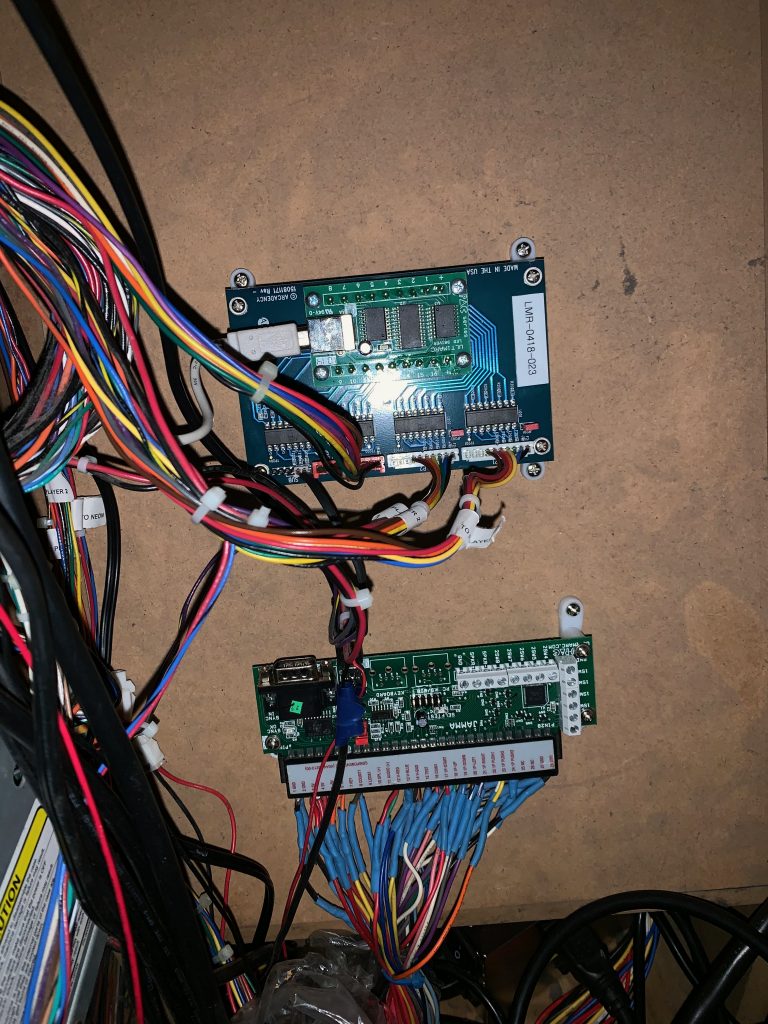
- J-PAC – A board that takes JAMMA input and converts it to USB keystrokes.
- LIT Board – Allows the lights in the pads, marquee and subwoofers to be controlled via USB, to be paired with a J-PAC or similar.
There are also some discontinued items worth mentioning:
- 573 Minimaid – An all-in-one board that controls both cab input and lights.
- LumenAR – Does the same thing as the LIT Board.
To connect inputs to a J-PAC or Minimaid, simply remove the JAMMA harness from the 573 and plug it into the pins on the board. Be careful that you do not insert it reversed. The JAMMA harness should have a white pin near one end of its connector that prevents it from being inserted improperly.
Similarly, remove the P1, P2, CAB and NEON cables from the 573 and plug them into your lights controller.
If you have a J-PAC and are not interested in controlling the lights on your cabinet, you do not need a LIT Board or LumenAR, but please note that these devices also take the extra step of setting your pads to “reset mode”. This is done as the computer can not properly interpret their input in their current state. To proceed without a lights controller, you must install a jumper to the PCBs inside the DDR pads. This jumper will set the pads to reset mode, and allow them to function properly with the computer.
For reference, the Player 1 side will be called “Left”, and Player 2 will be “Right”. On the left pad, unscrew the blank metal panel that is in the top-right corner of the left pad. Opening this will reveal a second panel. Note that its screws are very easy to strip. Use a Phillips screwdriver to very carefully unscrew them, and then reach under the panel and lift up to remove it. The I/O board is now visible.
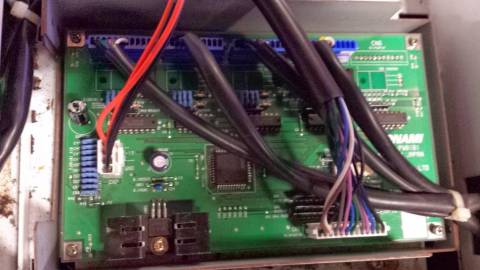
With the I/O board accessible, there are several ports with wires feeding into them. On the bottom-right of the board is a wide ribbon of cables of various colors. Take a piece of 16 gauge copper wire. Make sure that each end has a few centimeters of bare wire exposed. From the left-most end of the ribbon, find the first and third wires, counting from the left. One should be black, and the other should be white. Take one end of the copper wire and push it down into the black wire’s port as deep as possible (without applying excess pressure or damaging hardware). Now put the opposite end into the white wire’s port. This is jumping the two wires and putting the pad in reset mode.
Now jump the right pad. Its I/O panel can be accessed by removing the blank metal panel that is in the top-left corner of the right pad. Carefully unscrew its secondary panel (Again, these screws strip very easily) and you will see a board identical to the left side. It will also have black and white wires in the first and third positions. Bridge these the same way the left side was bridged.
The pads are now in reset mode, ready for the J-PAC.
J-PAC, Minimaid, LIT Board and LumenAR will likely require additional drivers to function with your PC. Please refer to the documentation that comes with your devices to set them up. Specifically, you will likely need to install WinIPAC for use with a J-PAC, whereas the other boards come with “care packages” containing documentation, tools, and drivers, although additional work might be necessary to interface with StepMania 5.
Python 2
Python 2 owners have a couple of choices. They can stick with the above list of hardware for 573 owners — although if going for a Minimaid they’d have to find either the “Betson” or “Universal” variants — or, they can entirely skip the extra hardware and reroute USB cables from within the Python 2 to their PC.
For those going the J-PAC/lights controller route, the process to connect to the hardware is similar to those who own 573s, but requires unplugging the P1, P2 and bass neon cables from the EXT-IO instead of directly from the Python 2. There is still one cable going from the cabinet’s amp box into “PORT 1” of the Python 2. You should unplug from PORT 1 and plug the cable into your lights controller’s “CAB” or “marquee/start lights” port.
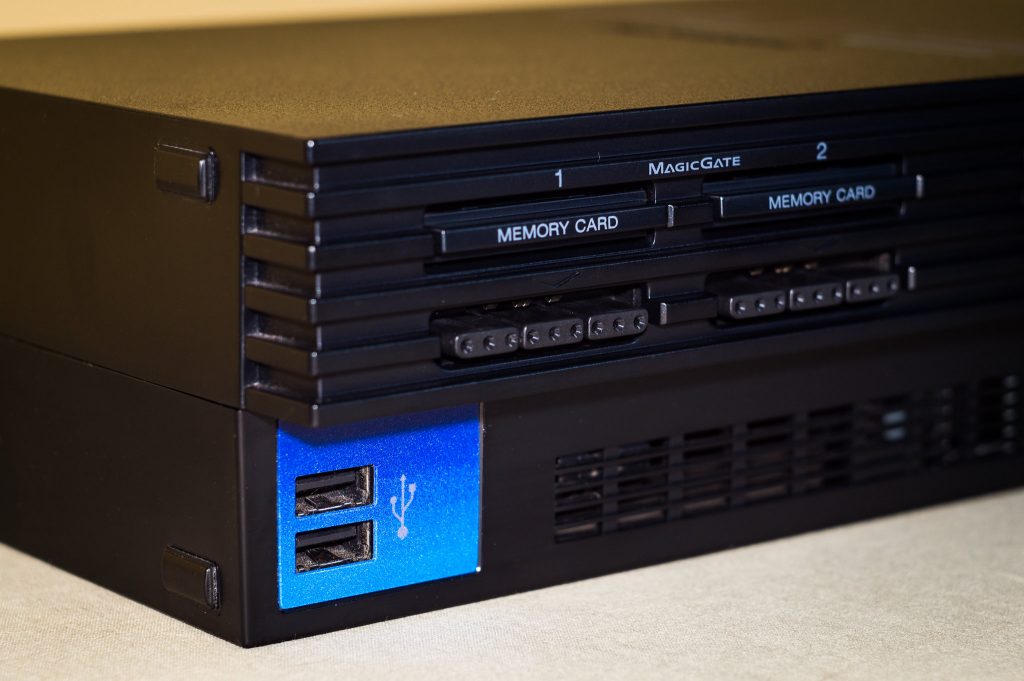
The alternate route is to open up your Python 2 (voilà, there’s a full-fledged PS2 sitting in there), unplug the two USB cables from the front of the PS2, and connect them to USB extension cables going to your PC. By default, your PC won’t be able to recognize these signals, but StepMania 5.3 implements support for P2IO (the I/O board inside the Python 2) and P3IO (for some Bemani PC owners).
Bemani PC
This section is specific to Bemani PC owners with an EXT-IO and P3IO interface. If you have a P4IO, you might be on your own for now.
Like with Python 2 owners, you should be able to install StepMania 5.3 and not make any hardware changes at all.
Monitor
If your cabinet has an LED monitor, it does not need to be converted to the appropriate frequency and resolution and therefore does not require additional hardware or software. A monitor not wired through JAMMA can plug directly into the PC’s graphics card. If you have a CRT, things get complicated:
System 573
The first step is to connect the female end of a VGA cable to your J-PAC or Minimaid, and the male end to your computer’s graphics card (which, of course, must have VGA output).
Your CRT screen might only support 15KHz, or it might also support 31KHz. Regardless, you will likely need extra hardware or software to be able to support these refresh rates and resolutions.
One option is to find a (now discontinued) ArcadeVGA, a video card which can output at 15KHz to CRT screens. Ultimarc’s store also sells a DVI to VGA adapter that you’ll need, and there is a low-profile bracket available for SFF PCs.
Another option for AMD video card owners is to use CRT Emudriver 2.0. You might also consider installing QuickRes to force Windows to always boot at a lower resolution.
Python 2
Follow the above steps if there is no VGA cable already connected to the RGB port of your Python2.
If a VGA cable is already connected to your Python2, simply unplug it and plug it into your PC, then follow the above steps, ignoring the section about the video port on your J-PAC or Minimaid.
Bemani PC
There’s probably nothing to unplug – simply follow the above steps concerning refresh rate and resolution.
Credits
Thanks to the helpful people on the Private Dance Games Arcade Owner group on Facebook.
- Adam Karonika
- Brandon Frodo Anders
- Jesse Wolcott
- Lob Starmagnet
- Paul Fisher
- TJ Lowry
Very cool! Any idea how closely this could be followed for an ITG2 Dedi-cab?
I don’t have a dedicab, so you might want to ask the Private Dance Games Arcade Owner group on Facebook: https://www.facebook.com/groups/180601838781725
But as far as I know, most of this guide does not apply to cabs with Boxors in them. A Boxor itself might not be able to support modern-day StepMania, so you might find that you need to extract the ITG-IO board inside it and plug it into a new PC. Either way, ITG-IO boards are entirely different beasts, although I’m quite sure that drivers exist that allow them to interface with Windows and/or StepMania.
The ITG2 Dedicabs are running Andamiro MK6’s with PIUIO input boards, which are old pc hardware (lga775/ddr2). You can run windows if you want, but they don’t run the best. A lightweight linux distro or rebuilding the system are recommended.
What about putting a MK9 in there? Would that work better? Obviously still need to get one, which might be troublesome.
Concerning the Python solution with P2IO, does it work with the lights ? Or only with the pads ?
I think it works with the lights as well if I remember correctly.
Thank you ! I’ll try
Don’t know if you already tested, but yes it does have lights functionality. I ran starworlds on Ubuntu.
Do I need to plug my speakers into the power supply or are they already powered?
Your speakers are powered by the amp in the machine.
Hi! I recently got a DDR X-2 cab and I’m wondering how do I go about getting stepmania installed on the windows machine. When the machine is on and windows is running, it doesn’t seem to accept inputs from a mouse or keyboard except in the prompt to open task manager and once I exit that prompt, the mouse and keyboard don’t seem to be responsive anymore. Any idea how I’m supposed to go about this?
Great question! Unfortunately I know very little about X cabs. You should post on this Facebook group. I know one or two other people have done this with their X cabs. https://www.facebook.com/groups/180601838781725
Thanks, I’ll look into the group. J got some helpful advice on reddit. Apparently punching in the Konami code will enable inputs but since the HDD is read only by default, I would need to write changes to the disk using some efimgr commands.
Apparently it will be easier if I just get a second HDD, install windows on it and boot from that.
Yeah, formatting the drive and/or starting fresh makes a lot of sense.
My cab came without speakers and I would like to install nice speakers in there and stop relying on computer speakers. How does the sound output work if there is a jpac in there? Ie – after plugging rca connections to the amp, where does it go from there? Also are there any restrictions for compatibility?
Hi Jeffrey,
Would it be possible to hook an external desktop PC (running Bemani PC DDR software, e.g: X2, X3, A) to a P2IO? (My cab is SN2 J-Cab; with 480p monitor).
I’ve successfully ran a SM5 Outfox previously on my P2IO, installed zadig to recognize the 2 USB-stack connected to P2IO.
Will at least my spice tools (used to map DDR HDD control) recognize my pads?
Thanks in advance!
Yes. Look for ddrio-python.
Hi Jeffrey,
Many thanks for your information
I am buying a Dancing Stage Fusion which is under Python 1
Do I have to do as for the 573 system (Jpac + LIT Board) or as for Python 2 I can directly connect USBs to the PC?
I have not yet received the cabinet and I find little information for Python 1
Thanks again from France!
Hi there! Unfortunately I know nothing about Python 1. I would join the Private Dance Games Arcade Owner group on Facebook and see if people have insight there.
Hi, I have succesfully followed your instructions to convert my DDR cabinet to Stepmania after the CD on my machine failed, it works great, but I would like to have changes made to the front end so that on machine start up it launches in to Dance Mode, The machine is placed in a kids party venue and is set to free play, all I want is the dance mode so kids can choose a song title and play the game with no access to any other controls, can you point me in the right direction please. Thanks in advance
You can add StepMania to your startup applications. Search for instructions on how to set that up on your operating system.
As for StepMania itself, look for Event or Free Play mode. It should hide the ability to quit the application.